When you are ready to book the customer for the next appointment, always ask the customer to rebook themselves via the self-service online booking portal. Information is included in their last booking confirmation email.
If they can’t rebook or if you need to book them on their behalf, follow this guide.
Before you begin
-
Customers who originally booked into your open telehealth schedule can only be rebooked into the same schedule type
-
View more information here: Converge Partner Information
-
-
You’ll be using the “Rebook with me” function which is explained in this guide
-
This guide won’t work for booking retrospective appointments (in the past)
1. Access Phoenix
Access the Converge Phoenix app via login.convergeint.com and make sure you are on the Quick View page in the Phoenix app
2. Find the customer listed
On the Quick View page of the Phoenix app, find the customer.
-
If you’ve recently completed an appointment, the customer will be listed in the “Appointments recently completed” section
-
If you haven’t completed the most recent appointment, the customer’s current appointment may be listed in the “Appointments not started” or “Appointments in progress” section of the portal.
-
If you can’t find the customer, scroll to the “Appointments recently completed section and use the Search function to find them.
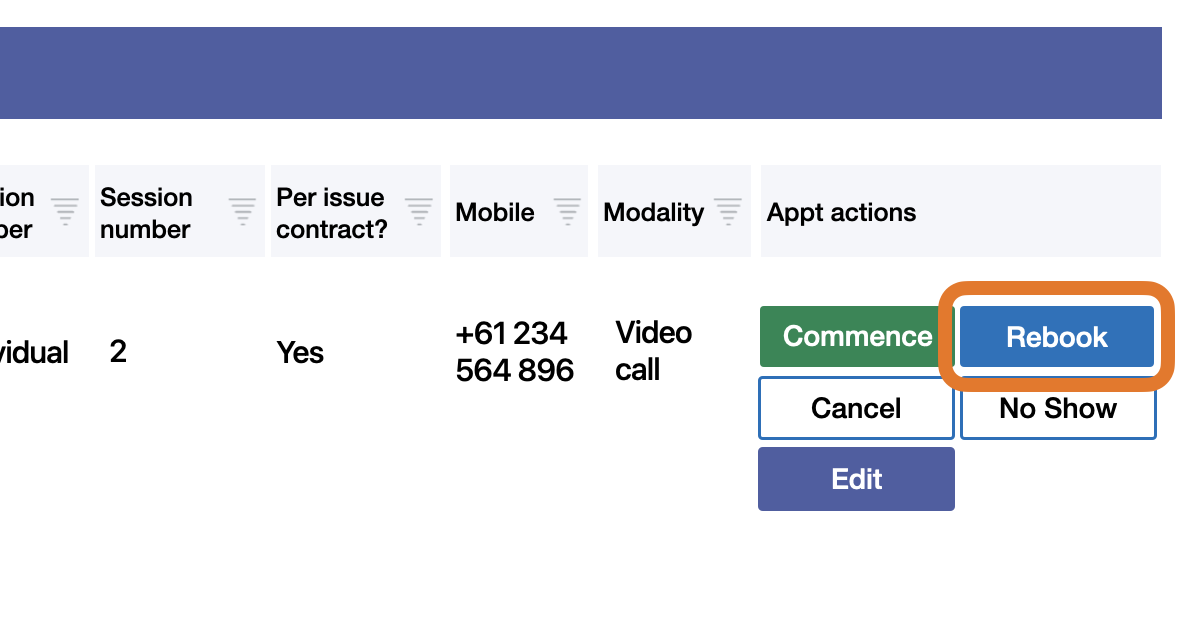
3. Select rebook
|
Once you find the customers' last or active appointment listed, click the Rebook button on the right side of the listing. |
|
|
Then, on the pop-up window:
|

|
|
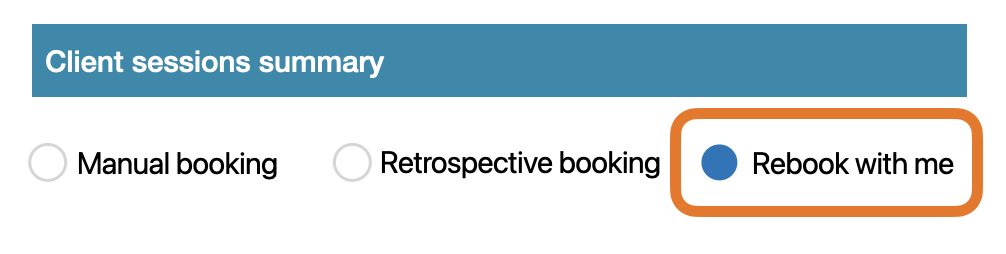
On the next screen, select Rebook with me option. Do not select any other option unless instructed to. |
|
4. Search for availability and book
-
Next, you’ll perform a search against your availability to book the next session.
Under Consultant Search header you can either:
A: Tick the Date selection check box to search between a time range and date range.

Note, the search range (start and end date) must be 14 days or less (over any months)
or B: leave without a tick to search by time range and across selected days of the week over any period

-
After using a search option, select the modality you want to see the customer in
-
Click Search for availability
-
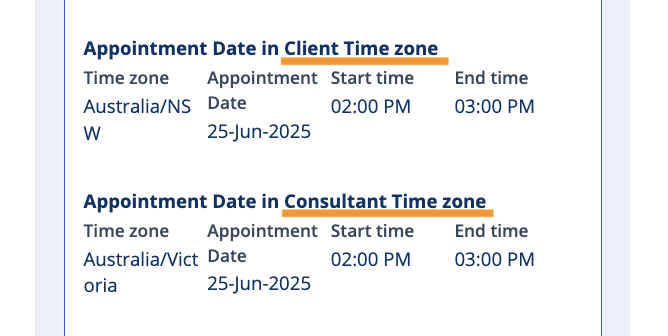
A list of appointments will be displayed (if available) and all times are shown in the customers' time zone. Click Book appointment to select the time
-
On the next screen, you will see a summary of the booking. Check the time and date is correct
-
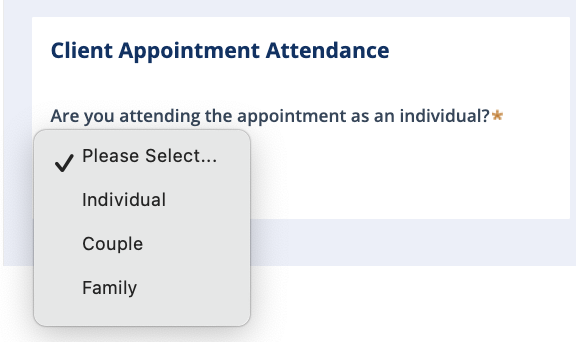
Under Client appointment attendance, Select Individual for the drop down
-
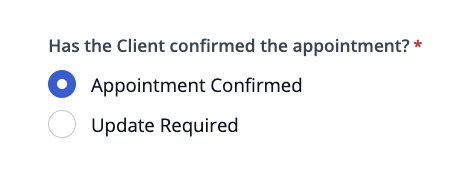
Ensure Appointment confirmed is selected
-
Then, click finalise appointment